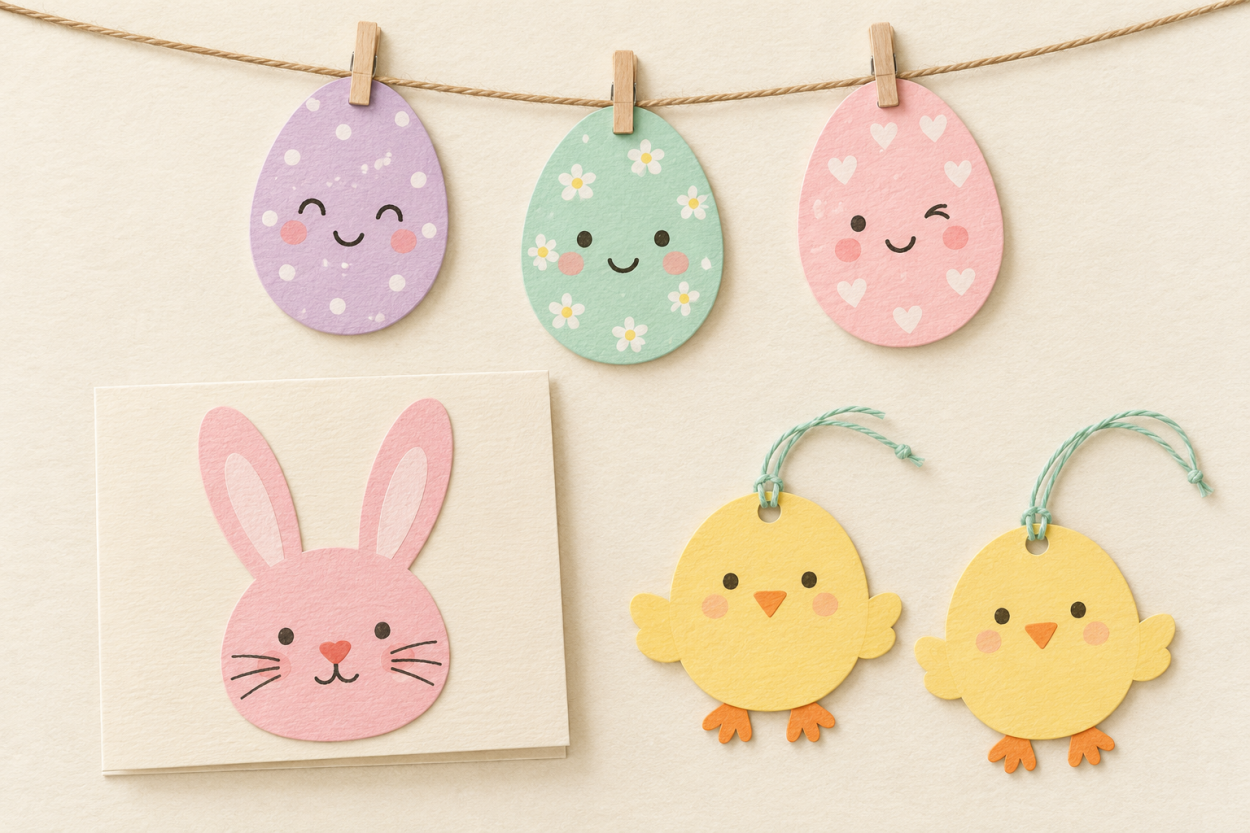
Make three kawaii Easter crafts with paper and cardstock: a smiling egg garland, a bunny greeting card, and chick tags for baskets and gifts.
Kawaii Easter Crafts: Simple Bunny, Chick, and Egg Decorations
An egg with a sleepy smile, a bunny on the front of a card, or a little chick tied to a basket can bring a playful detail to Easter.
These three kawaii Easter crafts use paper and cardstock, with no sewing or elaborate supplies. Make one for a small afternoon project, or use the same colors across all three for a matching set.
Gather Your Supplies
You’ll need cardstock, colored paper, a pencil, scissors, glue, and pens or colored pencils. For the garland and tags, you’ll also need string, a hole punch, and small craft clothespins if you choose the clipped garland version.
Try working with a few colors you already have. Yellow, pink, and mint make a cheerful combination, while lavender and cream can give the projects a quieter look.
Our kawaii color palette guide has more combinations to borrow.
If you’re crafting with children, choose cutting and gluing tasks that suit their abilities and help where needed.
1. Make a Smiling Easter Egg Garland
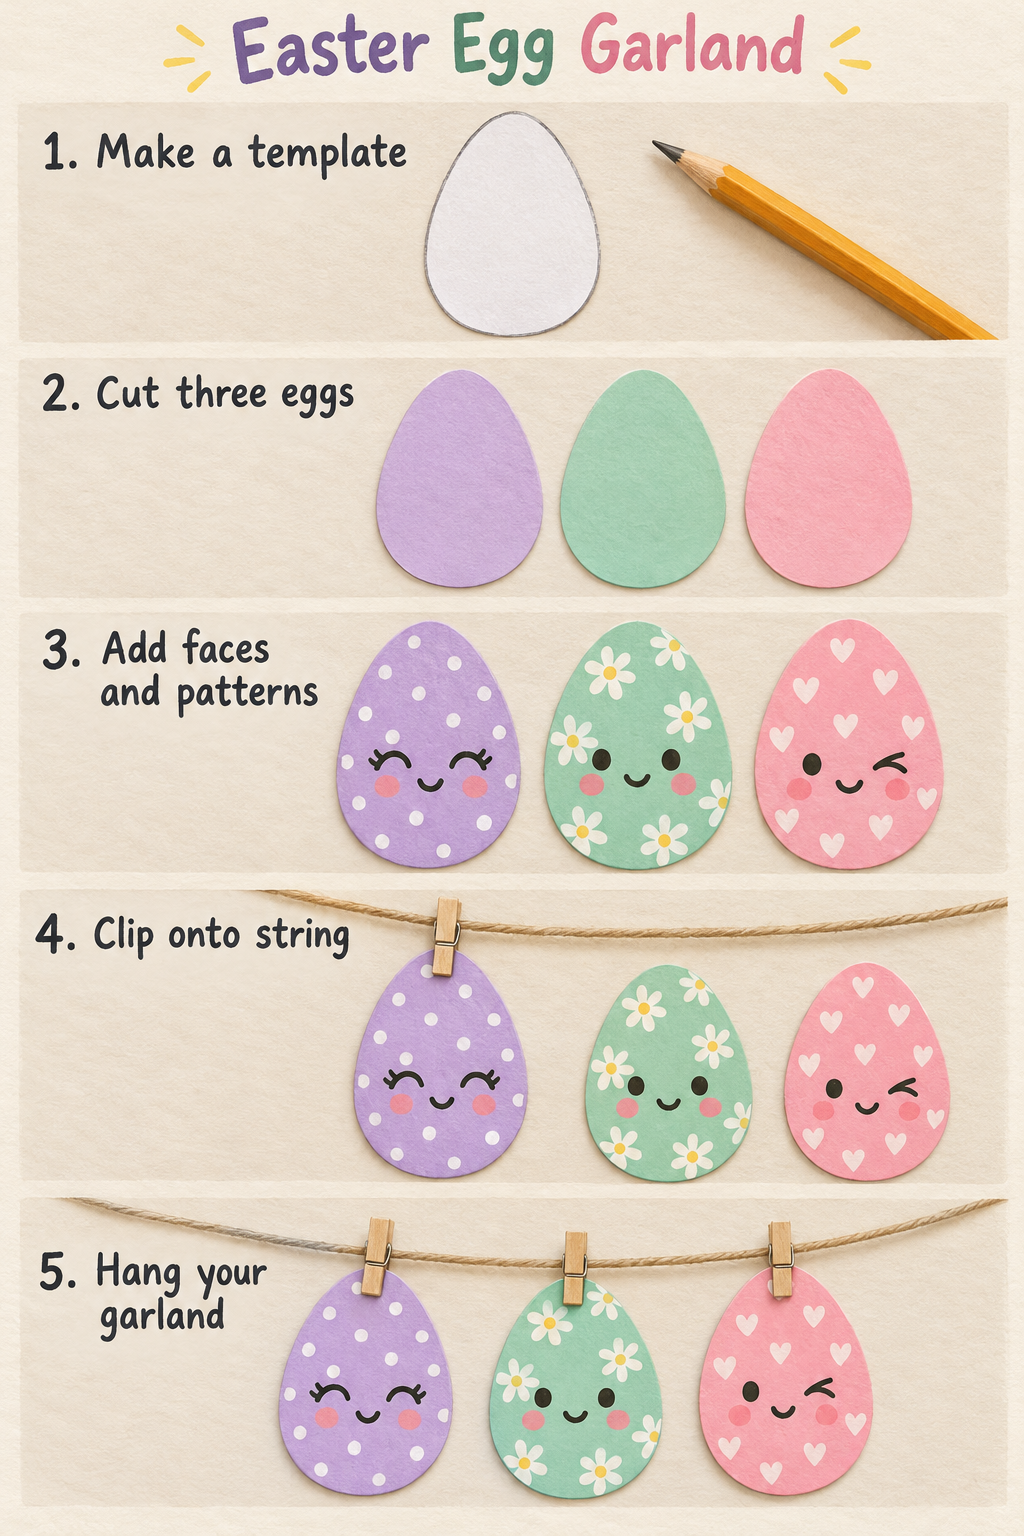
Draw an egg shape on scrap paper, narrower at the top and rounded at the bottom. Cut it out and use it as a template so your eggs have the same size and outline.
Trace three to five eggs onto cardstock and cut them out. Make one first and check its size against your clothespins before cutting the rest.
Sketch a small face near the center of each egg. Give them different expressions: one smiling, one sleepy, and one winking. Add dots, stripes, flowers, or hearts around the faces, leaving enough plain space for the expressions to show.
Lay the eggs in a row and try different color orders before attaching them.
Clip the top of each egg to a length of string using a small craft clothespin. Alternatively, punch two holes near the upper edge of each egg and thread the string through them. Leave enough cardstock around the holes to prevent tearing.
Space the eggs so they do not overlap, then hang the garland in a dry indoor spot.
For help with the expressions, our easy kawaii drawing tutorials show a few faces you can adapt.
2. Create a Bunny Greeting Card
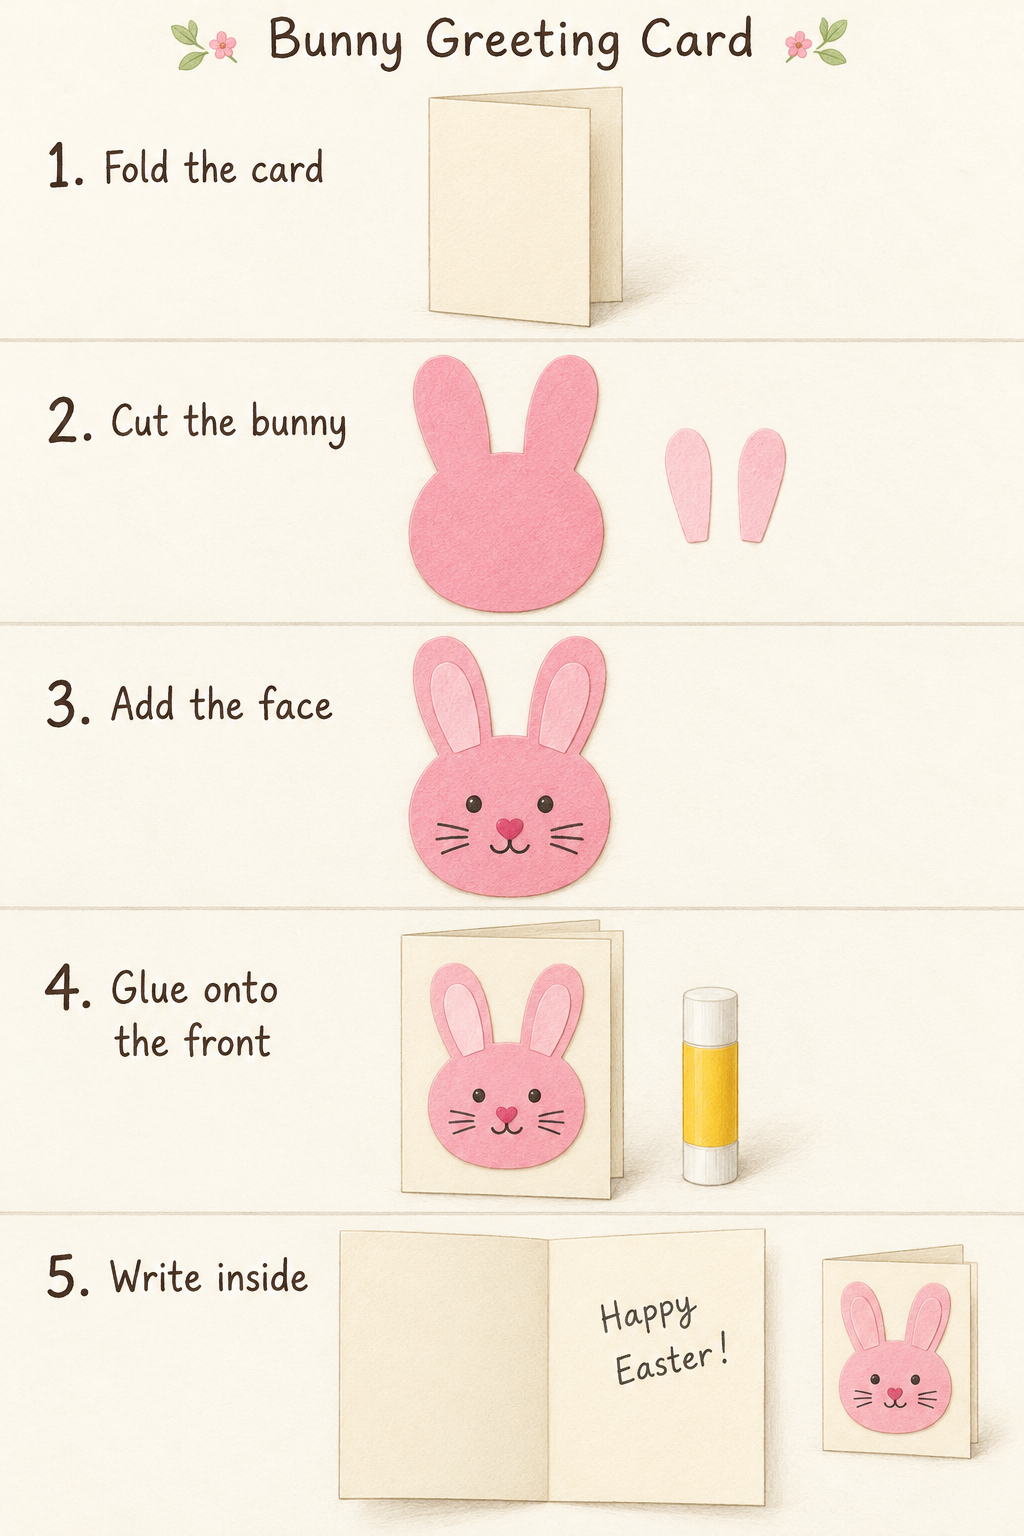
Fold a piece of cardstock in half and place it with the fold on the left.
On separate paper, sketch a rounded bunny head with two long ears. Check that the whole shape fits on the card front before cutting it out. Leave a border around the design so the ears stay inside the card’s edges.
Cut out the bunny and place it on the card without gluing it yet.
Add two small eyes, a nose, a mouth, and a few whiskers. You can draw the inner ears or cut smaller shapes from a lighter-colored paper and glue them onto the larger ears.
When you are happy with the arrangement, glue the bunny to the front of the card. Let it dry before opening the card to write inside.
A simple message such as “A little Easter hello” or “Sending you a springtime smile” can suit the design.
You can also make a smaller version to tuck beside a gift. Our cute sayings for cards and everyday notes has more wording ideas.
3. Make Chick Tags for Baskets and Gifts
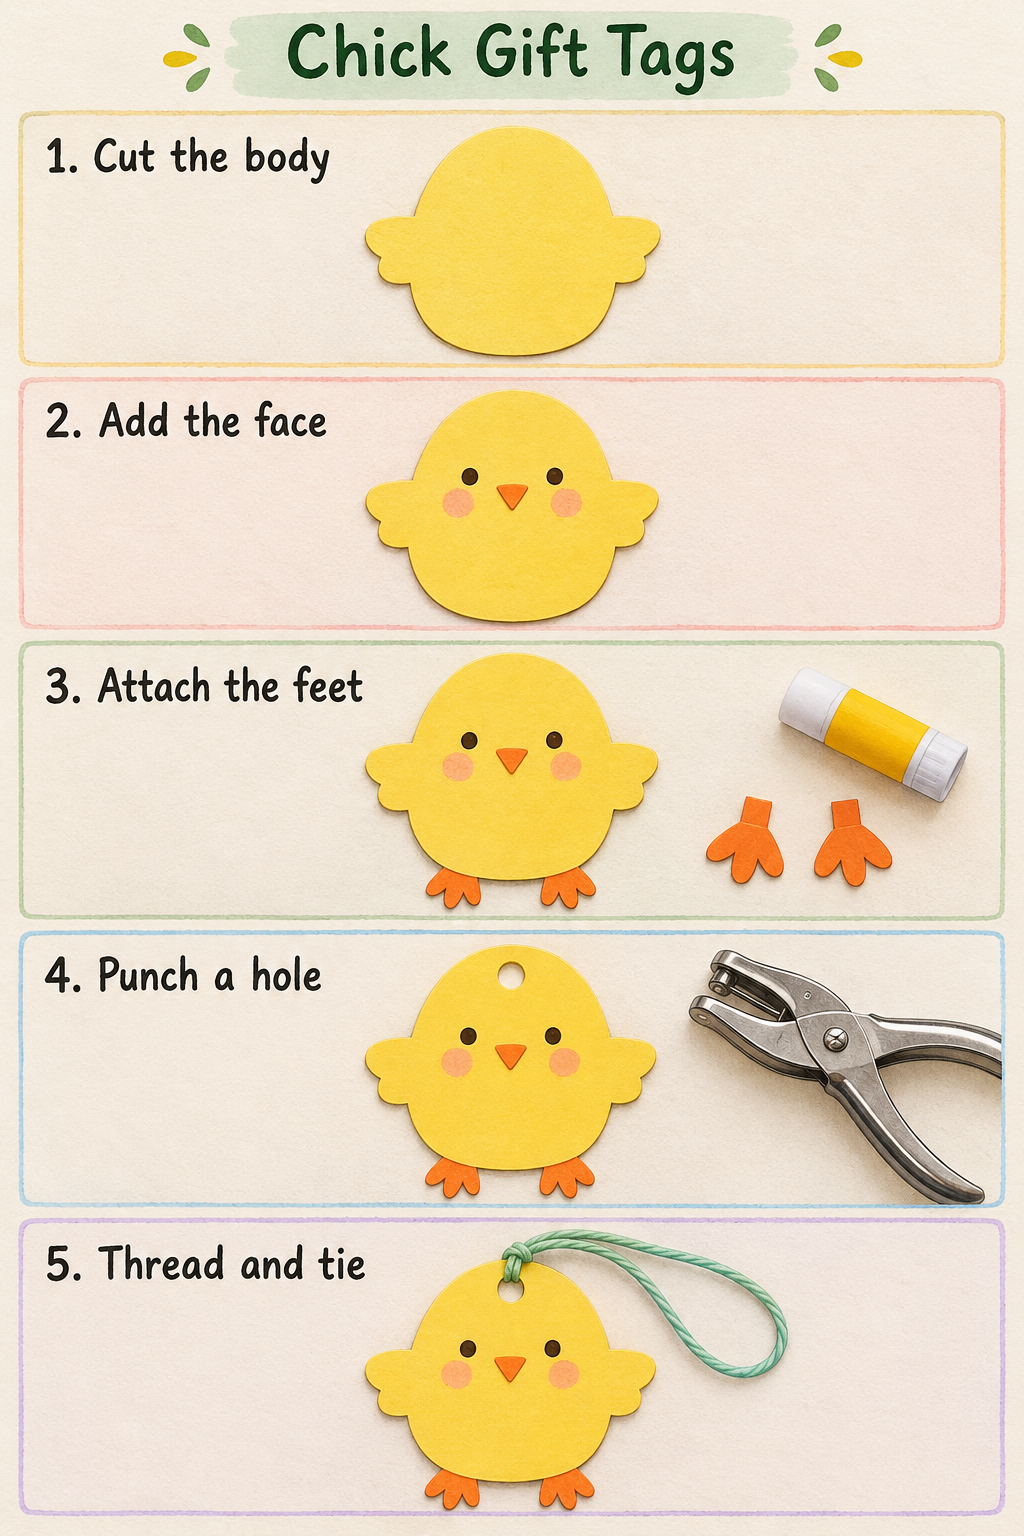
Draw a rounded chick body on yellow cardstock, adding a small wing shape on each side. Keep the wings broad enough to cut comfortably.
Cut out the shape, then add dot eyes and a small orange triangle for the beak. Draw the beak or glue on a paper triangle.
Cut two little feet from orange paper, leaving a tab at the top of each one. Glue those tabs behind the bottom edge of the body so the feet show underneath.
Punch a hole near the top of the chick, leaving a generous border above it. Thread through a short piece of string and tie it to a basket handle or wrapped present.
Write the recipient’s name on the back before attaching the tag. For a more decorative version, add rosy cheeks or a few tiny feather marks.
Make one complete tag first. Once you know how the pieces fit, use it as a guide for the others.
Bring the Projects Together
You can use the finished pieces in different parts of a room without making a large display.
Hang the egg garland above a small table, stand the bunny card on a shelf, and tie a chick tag to a basket. Repeating a couple of colors will connect them.
For a shared craft session, prepare a few templates and let everyone choose their own colors and expressions. The shapes can match while the characters look different.
If you would like more projects beyond Easter, our kawaii crafts guide includes bookmarks, cards, notebook covers, and other small makes.
Save the Pieces for Another Year
Keep paper decorations dry and store them flat where possible. Remove the garland’s clothespins before packing it away, and place tags in an envelope so their feet and wings do not catch on other decorations.
Keep your templates too. Next time, you can reuse the shapes and try new patterns or expressions.
A small set of paper characters is enough to give a corner some Easter personality—and each one can look a little different from the last.