
Try five easy kawaii food art ideas, including bear toast, animal pancakes, fruit faces, decorated cookies, and smiling rice balls at home.
Kawaii Food Art: 5 Easy Ideas to Try at Home
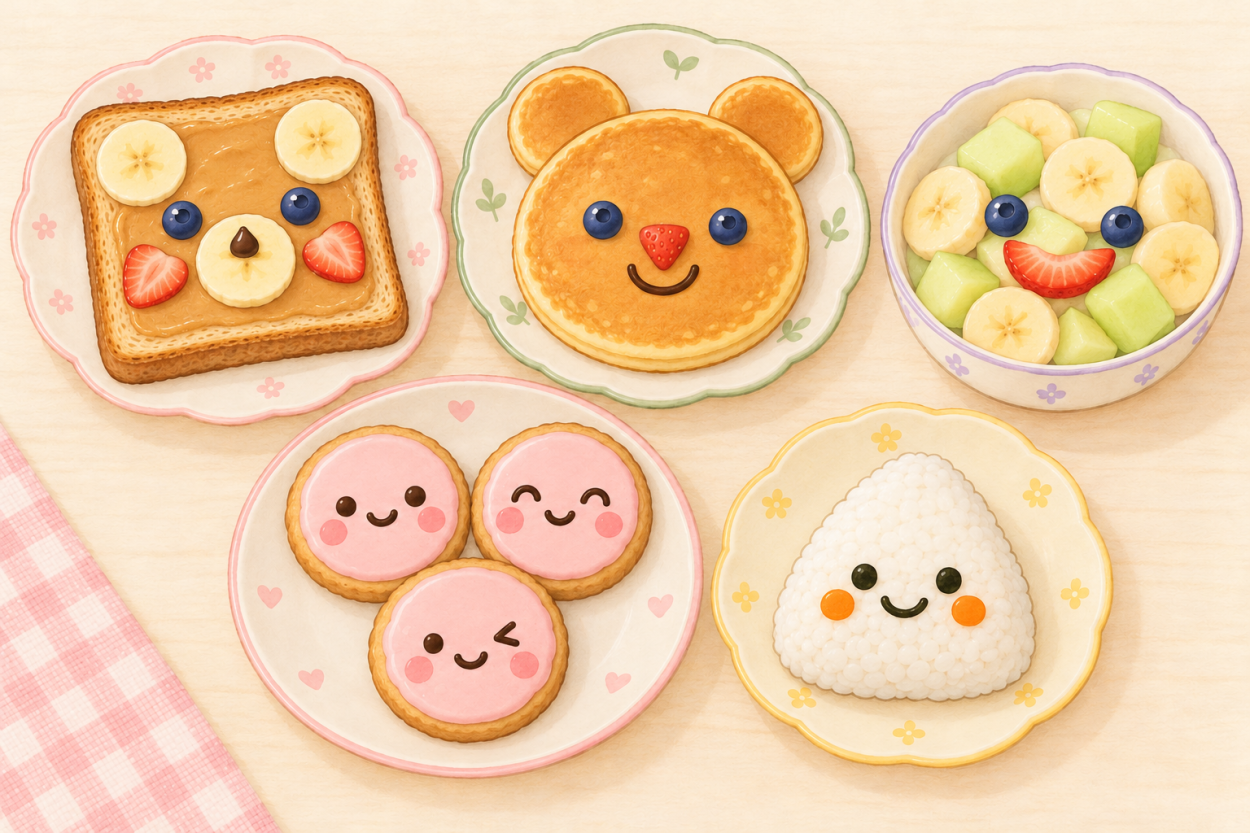
A slice of toast with a bear’s face or a pancake with strawberry cheeks can make an ordinary breakfast feel a little more playful. Kawaii food art is about arranging and decorating edible ingredients to create cute designs.
You don’t need to reproduce a complicated character or buy a collection of special molds. Start with food you already enjoy, then use a few small details to give it personality.
Here are five ideas to try, from a quick snack to decorated treats.
What Can You Use to Make Kawaii Food Art?
Round shapes and simple faces are an easy starting point. Two eyes and a small nose may be enough to turn toast, a pancake, or a cookie into a little character.
Choose decorations that taste good with the food underneath. Banana slices and blueberries work well on sweet toast, while cucumber, cheese, and nori suit savory food.
A small knife, spoon, and clean cutting board are enough for most of these projects. Cookie cutters and a piping bag can be useful, but you can begin without them.
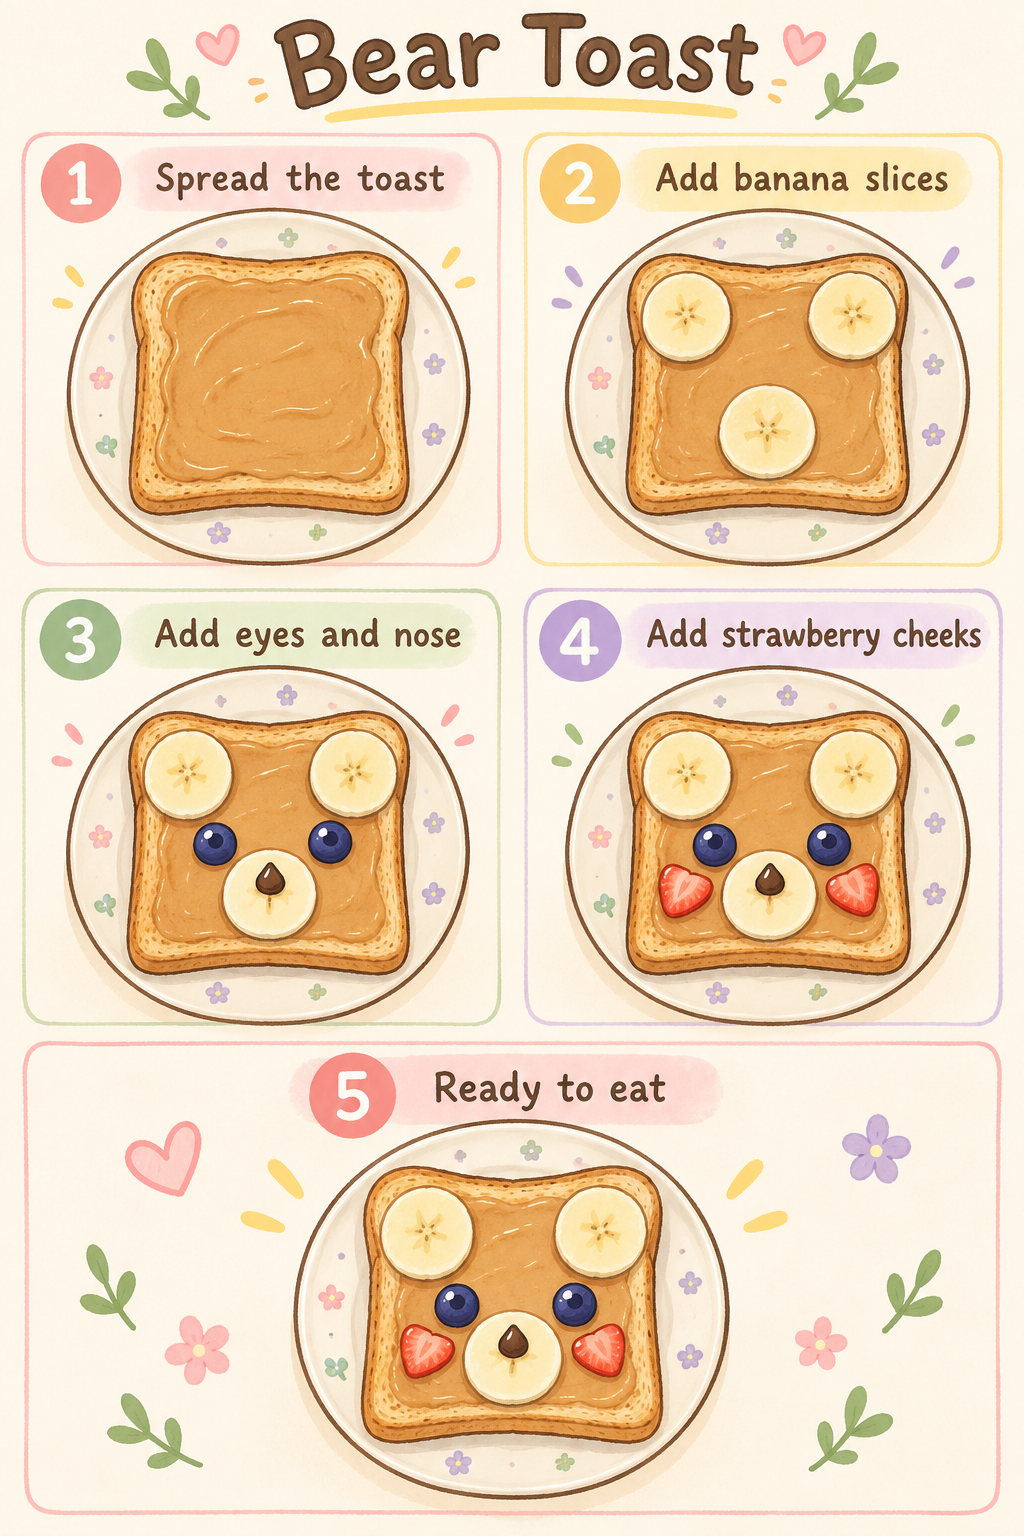
1. Make Bear Toast
You’ll need a slice of toast, a spread you enjoy, banana slices, and blueberries or chocolate chips.
Spread a thin layer of peanut butter, another nut or seed butter, or cream cheese over the toast. Place two banana slices near the upper corners for ears and one near the center for the muzzle.
Add two blueberries or chocolate chips for eyes. Put a smaller piece of chocolate or a dab of spread on the middle banana slice for the nose.
For pink cheeks, add two small pieces of strawberry beneath the eyes.
Try arranging the face while the toast is flat on the plate. Keeping the toppings in a single layer makes it easier to pick up and eat.
2. Turn Pancakes into Little Animals
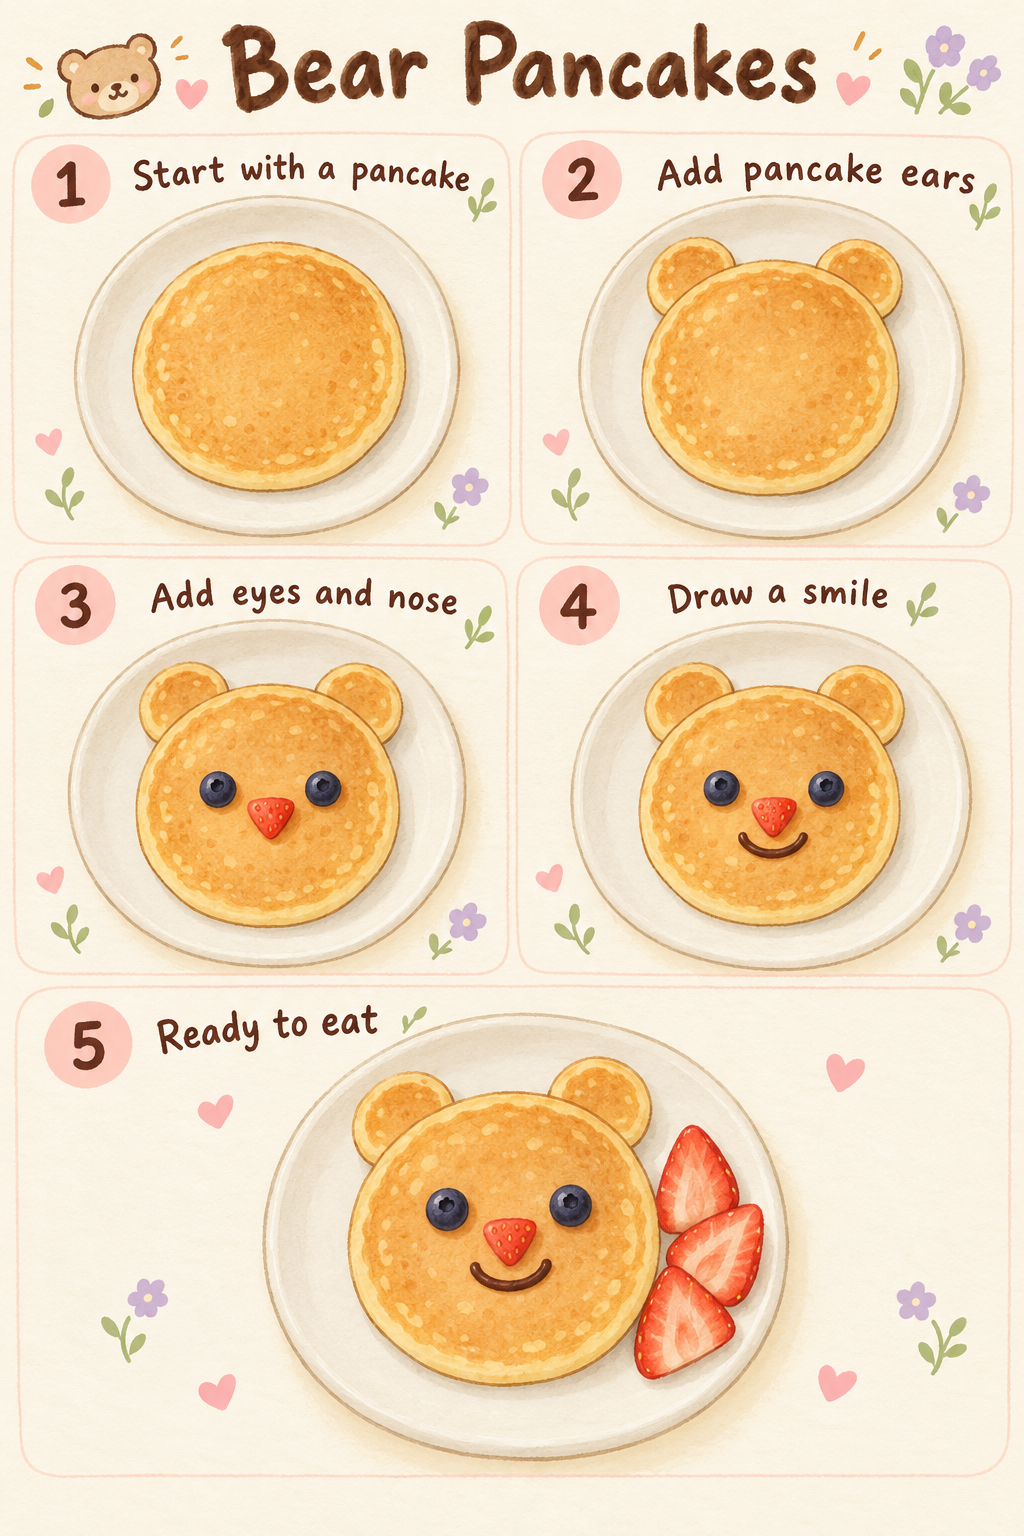
You’ll need cooked pancakes, fruit, and a little chocolate spread or another topping for the details.
Use one round pancake as the face. Cut two ear shapes from a second pancake and place them beside the upper edge. Round ears make a bear; longer ears can turn the same face into a bunny.
Add banana slices with small chocolate dots for eyes, or use blueberries on their own. A strawberry piece makes a little nose, and a thin line of chocolate spread can form the mouth.
For a smaller version, make a few mini pancakes and give each a different expression. Keep the decorations simple so you can finish them while the pancakes are still warm.
You can serve extra fruit alongside the animals rather than fitting every topping onto their faces.
3. Arrange a Smiling Fruit Bowl
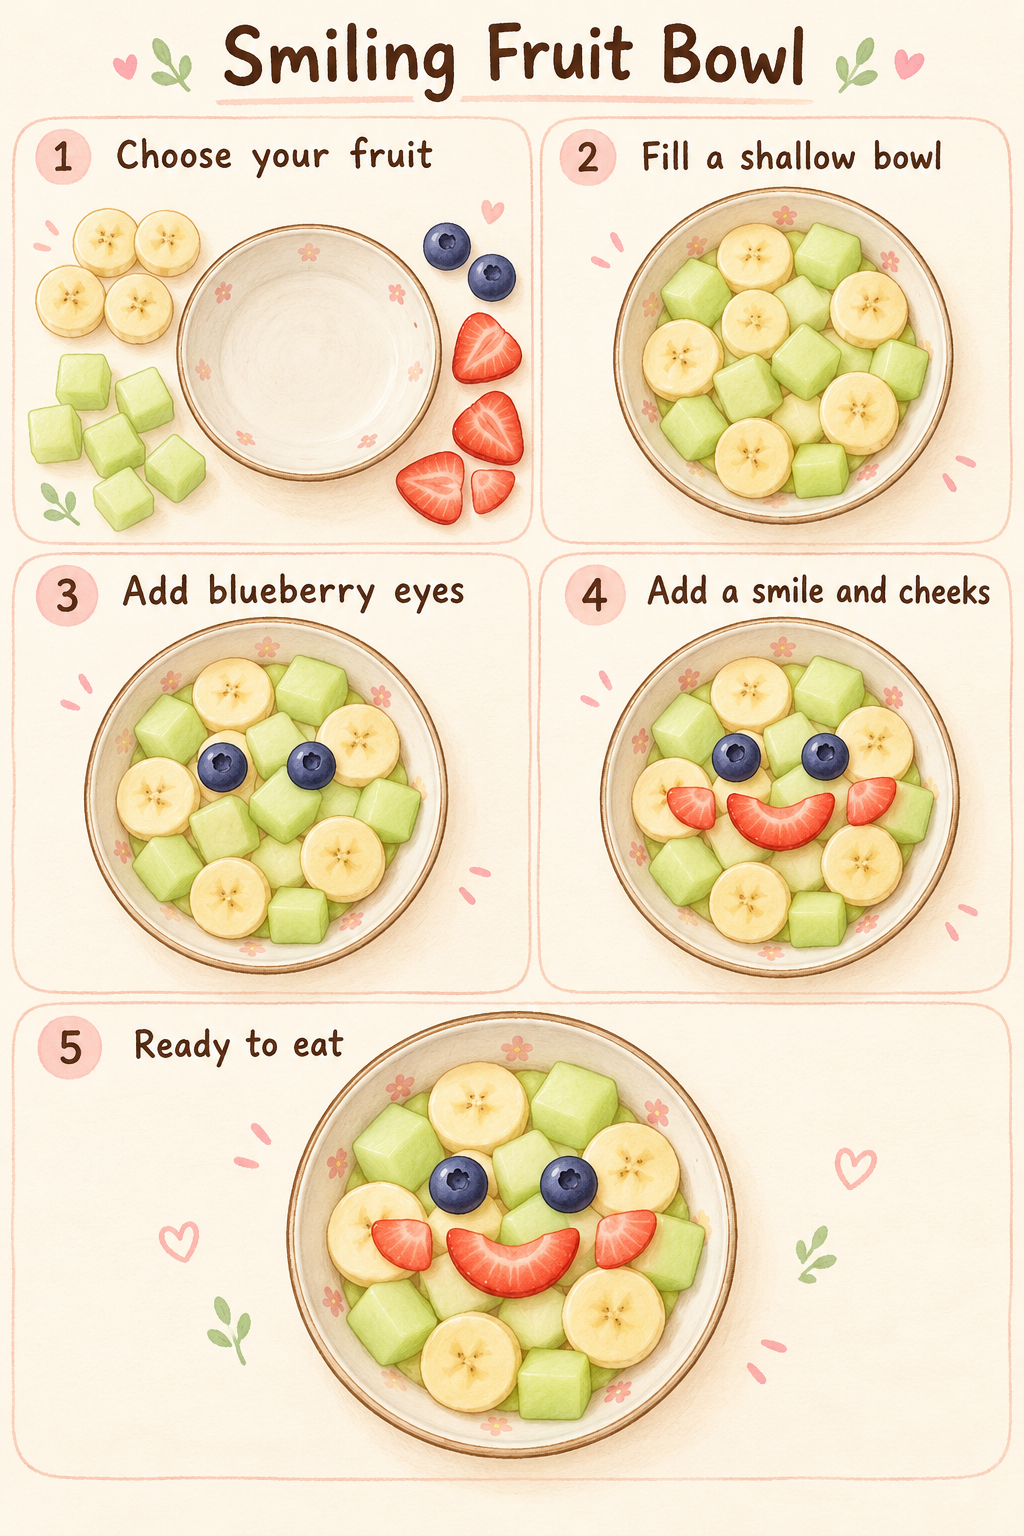
You’ll need fruit you like, a shallow bowl or plate, and a few smaller pieces for the face.
Arrange sliced banana, melon, or another pale fruit into a roughly round shape. Place two blueberries on top for eyes, then use a curved strawberry slice for a smile.
Add two strawberry pieces for cheeks. If you want to turn the face into an animal, place fruit pieces above it for ears.
A shallow dish helps keep the arrangement visible. Use small pieces that are easy to eat with a spoon or fork, and let the shape stay a little uneven.
You can make individual bowls with different expressions or arrange one larger fruit plate to share.
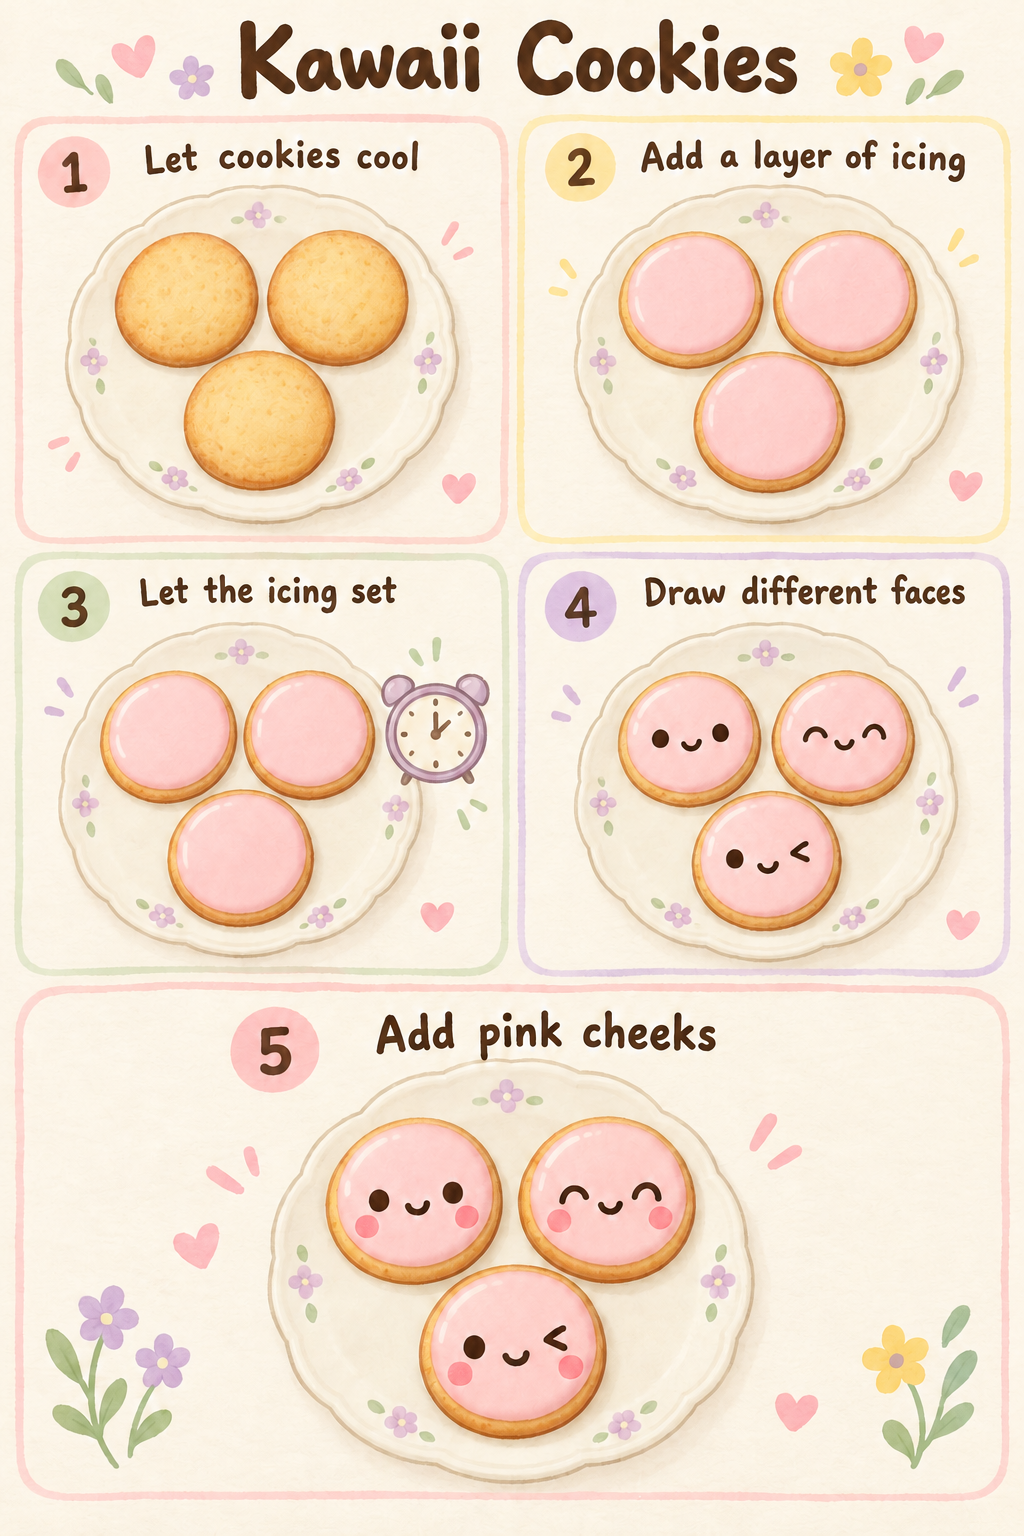
4. Decorate Simple Kawaii Cookies
You’ll need baked cookies, icing, and a small amount of melted chocolate or darker icing.
Start with round cookies so there’s no need for a special cutter. Once they’ve cooled completely, cover the tops with a thin layer of icing.
Let that layer set before adding two eyes and a tiny smile with chocolate or darker icing. A piping bag with a small opening gives you control over the details. You can also use a clean toothpick to place small dots.
Add pink icing cheeks or a simple bow if you’d like more decoration.
Try a few faces on a spare piece of baking paper first. This helps you judge how much pressure to use before decorating the cookies.
5. Make a Character Rice Ball
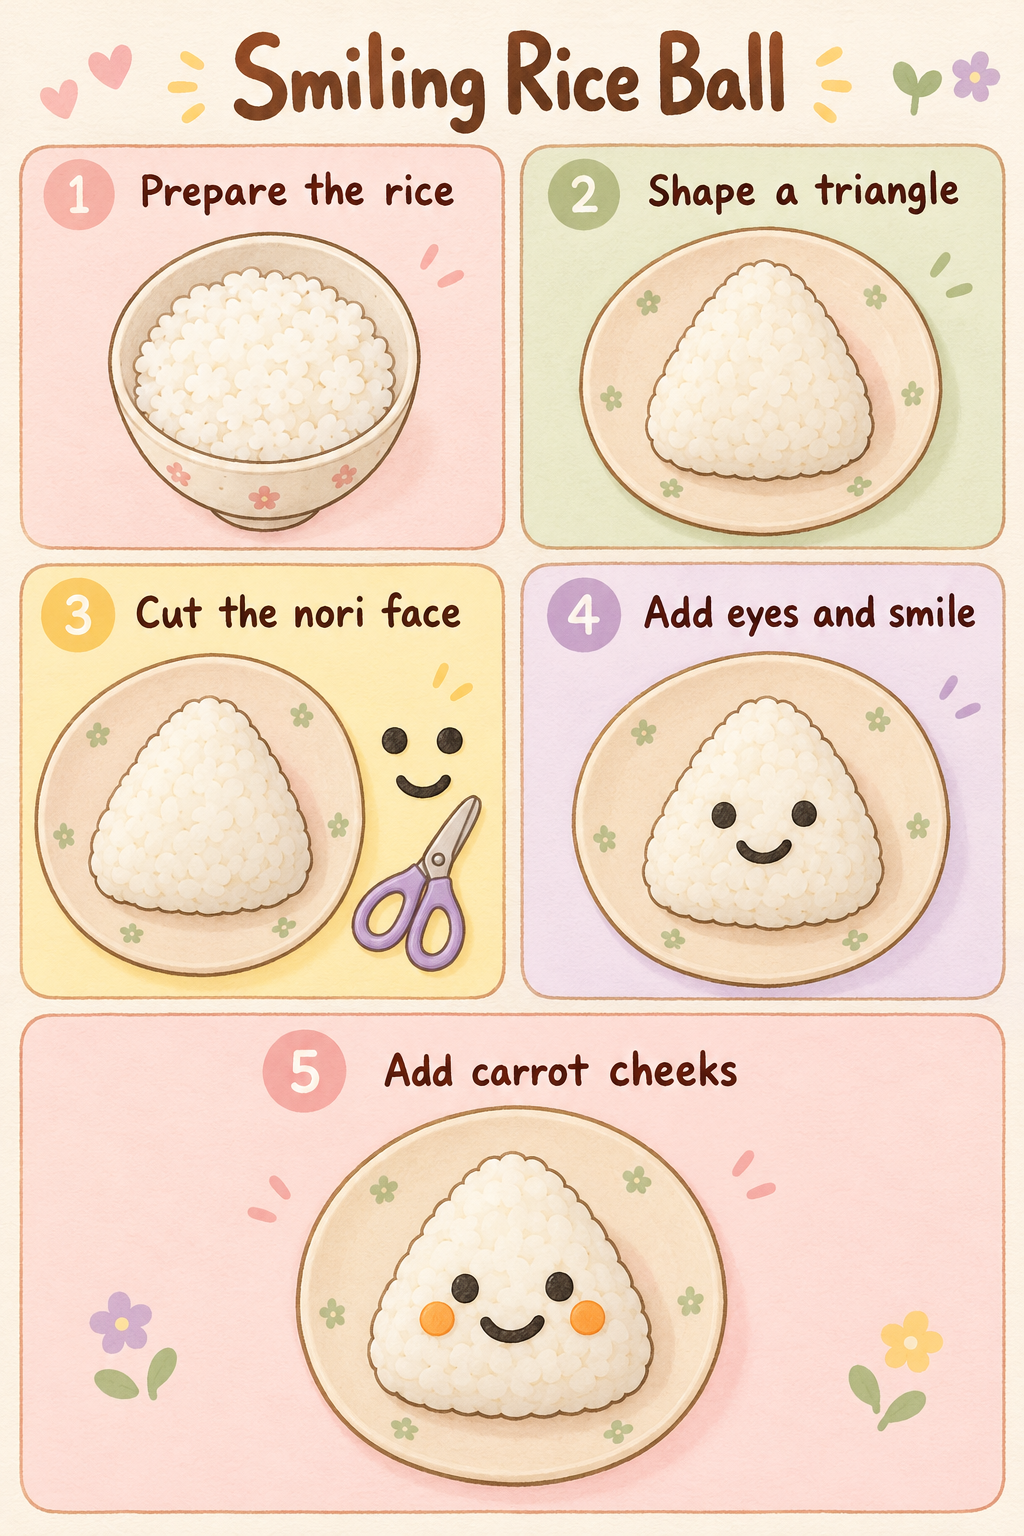
You’ll need cooked Japanese short-grain rice, nori, and optional edible details such as a small piece of carrot or cheese.
With clean, lightly dampened hands, gently shape the rice into a rounded triangle or ball. You can also use a rice-ball mold if you have one.
Cut two small eyes and a mouth from nori using clean kitchen scissors. Place them on the surface of the rice, pressing lightly so they stay in place.
Add small edible cheeks if you like, or leave the face as it is. A triangle with two eyes and a tiny smile already has plenty of personality.
Serve it as part of a meal with your preferred accompaniments. For ideas on arranging a complete lunch, see our guide to kawaii bento boxes.
Keep the Decorations Easy to Eat
Everything placed directly on the food should be edible. Use food coloring and edible decorating pens intended for food rather than ordinary craft supplies.
Choose ingredients with allergies and the people eating them in mind. If you use food picks for presentation, make sure they’re clearly visible and removed before eating.
Make one decorated item the focus of the plate. A bear-shaped piece of toast can sit beside ordinary fruit, and a character rice ball can go with a straightforward lunch.
Where to Go Next
If you enjoy making cute lunches, a rice mold or small cutter might be useful. Our kawaii kitchen gadgets article introduces some of the tools used for decorating food.
For tiny food-inspired objects to display or turn into accessories, explore our miniature food article. Clay and resin creations belong to the craft side of food art and aren’t edible.
Pick one idea for your next snack or meal. Once you’ve tried a simple face, changing the ears, toppings, or expression gives you another version without starting from scratch.

